Being a member of a CSA or growing one’s own food raises the question of how to begin to preserve fresh produce. One method of preservation is fermentation. There are many wonderful resources about how to ferment at home, but my favorite place to begin is with Sandor Katz’s classic Wild Fermentation. Katz also has a website full of interesting recipes and ideas where he shares a basic recipe for sauerkraut, which is a great place to begin.
I made kimchi using the basic cabbage kimchi recipe that Katz shares in Wild Fermentation. Kimchi is a nutritious probiotic Korean pickle. It is spicy and tasty and is served as a condiment. This is a very simple recipe and there are many, many variations available, so if you are interested in making your own kimchi explore other variations and share them with us.

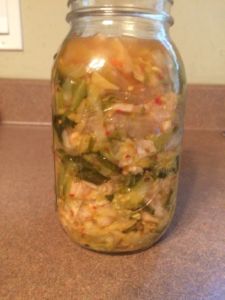
After preparation, the kimchi should ferment for about a week and then be refrigerated.
Baechu (Cabbage) Kimchi
Ingredients for 1 quart:
sea salt
2 heads cabbage
a few red radishes or 2 daikon radish (optional)
1-2 carrots (optional)
1-2 onions (or more)
3-4 cloves of garlic (or more)
3-4 hot red chiles (or more). (I actually didn’t have chiles, so I used red pepper flakes). You could use another hot pepper, be it fresh or dried, or in a sauce. Just make sure the hot sauce does not contain preservatives because preservatives will inhibit the fermentation process.
3 tbs fresh grated ginger (or more)
fish sauce (optional/no preservatives)
Directions:
–Mix a brine of about 4 cups distilled or spring water (the chemicals in tap water will inhibit the fermentation process) and about 4 tbs sea salt (not iodized) until salt is thoroughly dissolved.
–Coarsely chop cabbage, radish, and/or carrot and let the vegetables soak in the brine, covered by a plate or other weight to keep the vegetables submerged. Soak until soft, a few hours or overnight (I soaked overnight). Then, if you like, add a few extra veggies, like chopped snow peas.
–Prepare spices: grate the ginger, chop the garlic and onions, chop or crush the chiles. Kimchi can absorb a lot of spice–experiment with your quantities. Mix together. You can add a bit of fish sauce at this stage if you wish.
–Drain brine off vegetables, reserving brine.
–Mix the vegetables with the ginger-chile-onion-garlic mix. Using your hands, mix everything together thoroughly and stuff into a clean quart-size jar. You might have a little extra; just place in another smaller jar. Pack it tightly into the jar, pressing down until the brine still on the vegetables rises. If necessary, add a little of the reserved vegetable-soaking brine to submerge the vegetables.
–Then, you have two options. 1) place the jar in a corner countertop of your kitchen where it will not receive direct sunlight. Cover it with a cloth. Each day press down the vegetable mixture with your fingertips to make sure the vegetables stay submerged in the brine. This is the key to successful fermentation. You should do this every day for about a week. You can also taste the kimchi each day. Or, 2) If you don’t think you can or want to press the vegetables down every day, weight the vegetables down with a smaller jar or a zip log bag filled with some brine. Cover with a cloth and sit on a coutertop out of direct sunlight.
–Ferment in your kitchen or another warm place. After about a week of fermentation, when it tastes ripe (a matter of preference), cover with a lid and move it to the refrigerator.
Members, we love recipes and ideas about how you prepare your CSA veggies. Email recipes, ideas, and photos to megan@fairridgefarms.com